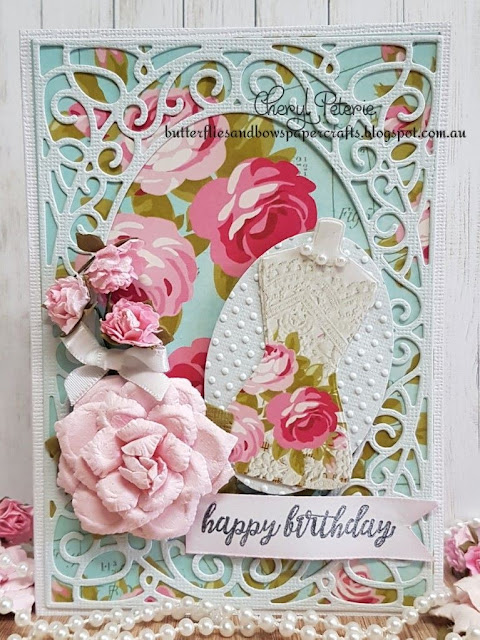
Creative Team - Boutique Elegance Card
By Cheryl Peterie
Products Used
Kaisercraft Miss Betty
Collection 12" x 12" Paper - Stitched
Kaisercraft Miss Betty
Collection 12" x 12" Paper - Tapestry
AC Cardstock 12" x
12" - Rain (or pale Blue)
Sticky Pearl Strip
1/4" Satin Ribbon -
White
Sentiment Stamp of choice
(pictured is Kaisercraft Happy Birthday)
Tools
Basic tool kit (Crafts4U
trimmer, scissors, Crafts4U double sided Tape, Crafts4U Foam Tape, pencil,
tweezers etc), Glue, Washi Tape (for holding dies in place), Die Cutting
Machine.
Instructions
(NB; with nesting
dies No.1 being the smallest)
Die-cut the following pieces
·
Rain Cardstock -
Layered Frame & the No.4 Oval (emboss the oval with the Tiny Dots folder)
·
Pattern Paper -
Tapestry - No.2 Mannequin (largest) I used the bottom left corner of the paper place
a tiny strip of pearls around the neck.
Cut the base card from the
12" x 12" White cardstock measuring 15cm x 21cm fold in half &
score, cut a pattern background panel to 10cm x 14.5cm & attach to the card
front.
Using a fine tip glue
adhere the frame die-cut to the pattern panel.
Trim the small rose stems
& wrap one of the stems around to secure all three & adhere with glue
to the card front, Attach the Mannequin to the embossed oval & mount using
foam tape to the card front.
Using glue adhere the
large flower over the stems of the small roses & a small bow in between.
Stamp a sentiment onto a
piece of leftover cardstock, cut into a banner & blend the edge with
Distress Ink - Spun Sugar, place a piece of foam tape to the middle of the
banner & glue either end down slightly curling the right end up.
Created by: Cheryl Peterie


Beautiful card, I have most of the supplies so may try to make something similar. Thank you
ReplyDeleteThank you, I love this Layered frame die it is so dainty,happy crafting Cheers Cheryl
ReplyDelete