Showing posts with label Catchy Crafts. Show all posts

Wednesday, 4 July 2018

Creative Team Merry Christmas Shaker Cards

Creative Team Merry Christmas Shaker Cards

by Cookie Aguilar

Cookie loves making shaker cards and has used the Crafts for you Square Merry Christmas Die to make two different shaker cards. One is on a square card base and the other is on a standard C6 sized card base. Check out her supplies list below:

Square Merry Christmas Card:


Supplies:

Crafts 4U Merry Christmas Square Die 10202
Crafts 4U Funky Xmas Trees Die 10126
Red Foil Card A4
Sequins
Crafts 4U Foam Tape
Crafts 4U Double Sided Tape
Acetate Sheet
Assorted Christmas Papers


C6 Merry Christmas Card:


Supplies:

Crafts 4U Merry Christmas Square Die 10202
Crafts 4U Proud Reindeer Die 70016
Red Foil Card A4
Silver Foil Card A4
Sequins
Crafts 4U Foam Tape
Crafts 4U Double Sided Tape
Acetate Sheet
Assorted Christmas Papers


Wednesday, 16 May 2018

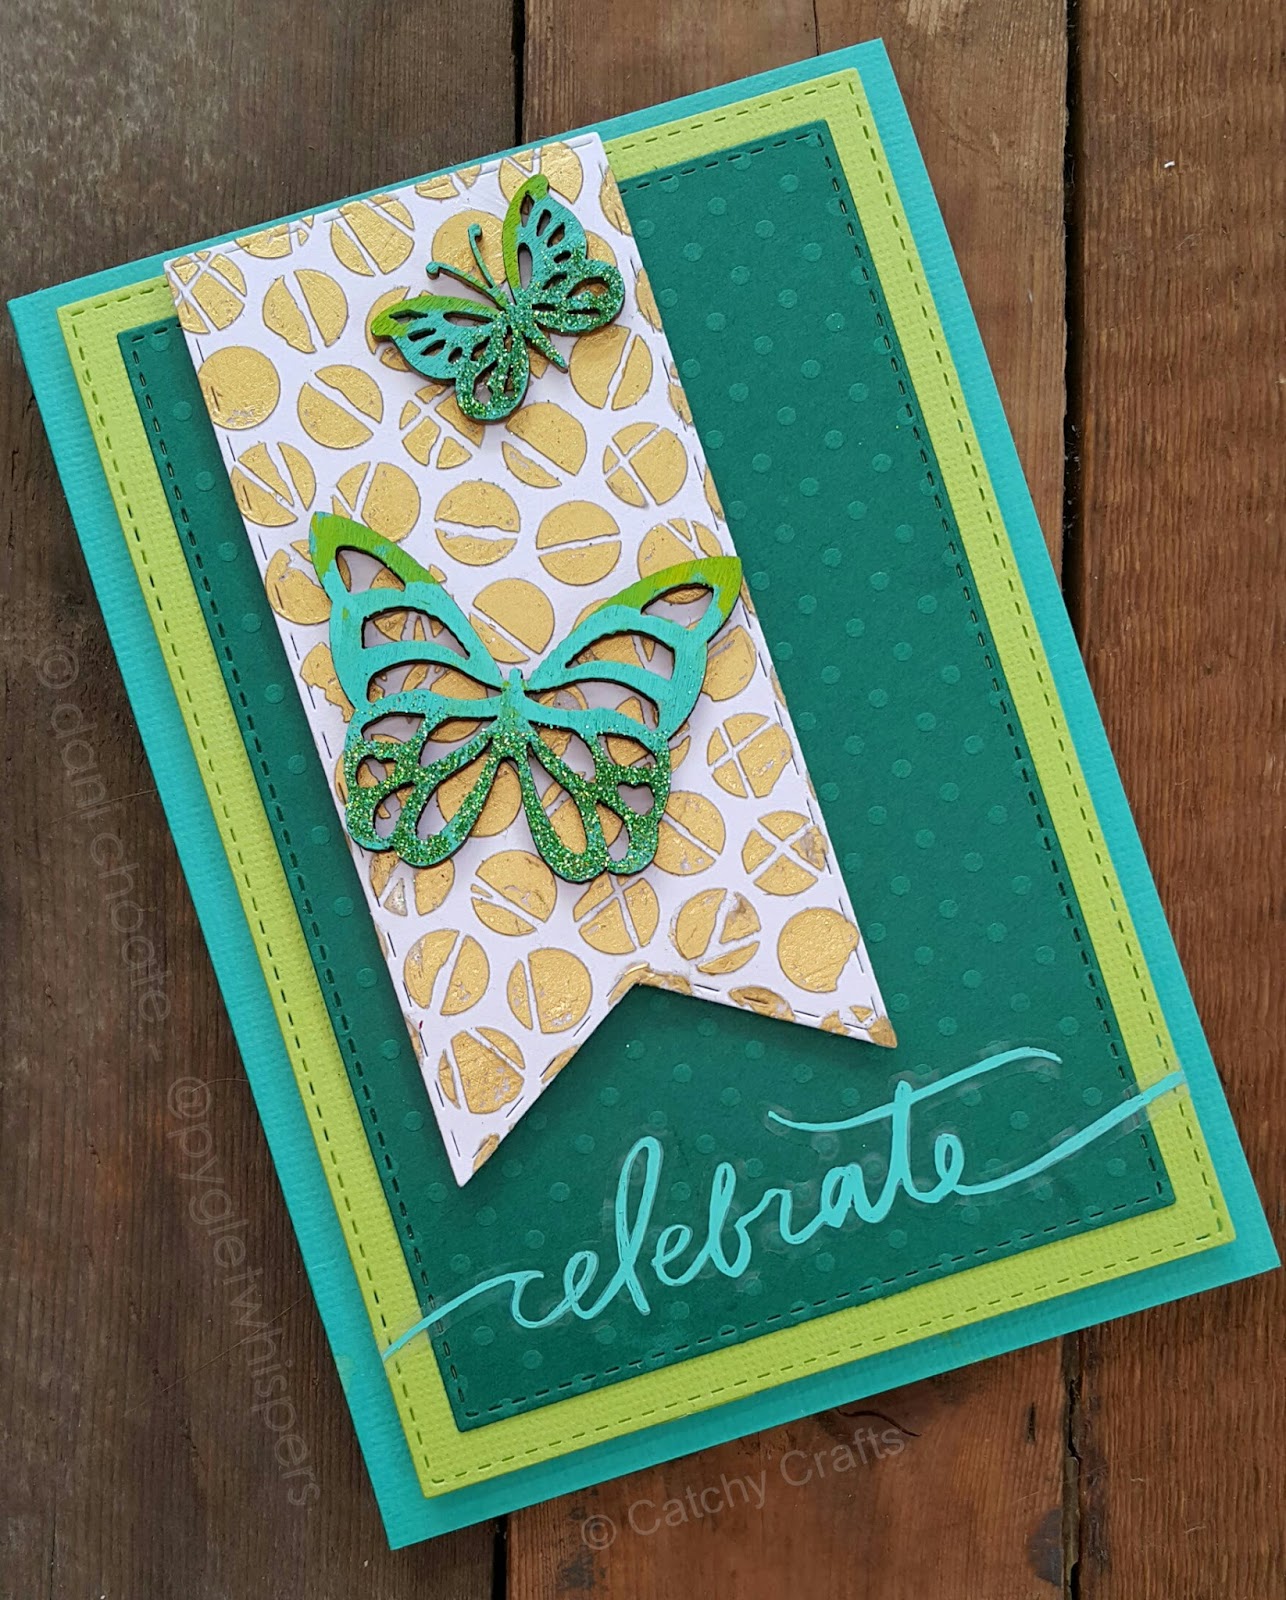
Creative Team Celebrate Butterfly Card

Creative Team Celebrate Butterfly Card

By Creative Team member - Dani Choate


Supplies:

Crafts 4U Stitched Rectangles Die - SDHX0048
Cadence Spots stencil - CADMU41 - (DARKROOM DOOR - small polka dots used)
Posca Pens -Aqua Green & Light Green
Create365 'celebrate' stickers
Kaisercraft Card Stock - Aqua green cardstock (card base) - Lime green cardstock - Deep Teal dot cardstock


Instructions:

Start by creating a C6 card out of Aqua cardstock
Die cut a Stitched rectangle in Lime green and another smaller sized stitched rectangle in deep teal
Mount these two rectangles with foam tape under the lime green and double sided tape under the deep teal.
Working on the white card stock, Use a stencil, a palette knife and the Cadence cream foil bond. Stencil the foil bond through the stencil cleanly and put aside until it has dried enough that the cream colour looks clear
Place the Heat Activated Foil onto the foil bond, once adequately dry. Once the gold has transferred you now have a patterned gold paper
Die cut the patterned gold card that you have made with the large stacked banner
Mount this banner shape with foam tape at the top right hand side of the card
 
Take the wooden butterfly embellishments. One large and one smaller. Colour with posca pens or acrylic paint. Aqua Green at the bottom and a small touch of light green at the top. Whilst still wet add Ultrafine green glitter to the bottom of the butterflies. The acrylic paint should adhere the glitter.
Attach both butterflies to the gold section of the card and also adhere the title to the bottom


Monday, 14 May 2018

Creative Team Butterfly Greetings Card

Creative Team Butterfly Greetings Card

By Creative Team member - Linda Drynan


Supplies:


Small pieces of green coloured card stock (three different greens for leaves)
Small 2mm adhesive bling


Instructions:

 
Cut piece of white card stock 4 by 5 7/10 inches (10 cm x 14.5 cm)

With your sponge applicator, randomly apply the 3 distress oxide colours over the card.  I always start with my lightest colour eg spiced marmalade and progress to the darkest. Cover the entire piece of card.

Then take another piece of white card stock 3 9/10 by 5 ½ inches (9.7 cm by 13.7 cm) and die cut the filigree butterflies in the upper left position and bottom right area retaining the die cut butterflies.

Fold your green card base in half and attach the dioxide coloured piece on top.  Then take the die cut piece of white card stock and attach on top.  Apply glue just to the abdomen of the die cut detail butterflies and replace in the space from whence they came.  Die cut 3 pieces of the swirl part of the Crafts 4U 10152 butterfly swirl die in the three variations of green card stock.  Trim just before the butterfly and attach to the card.  Add some 2 mm crystal bling to the tips of the antennae of the butterflies and a couple of groupings of three around the card.   Finally, glue the wooden Happy Birthday greeting on to some of the dark green card stock, trim and attach to the card.


Saturday, 12 May 2018

Creative Team Sending Big Hugs Shaker Card

Creative Team Sending Big Hugs Shaker Card

By Creative Team member - Yoonsun Hur


Supplies:


Instructions:

 
My card today, I used the C4U Mable Butterfly & Claudie Butterfly dies as my main supplies. I die cut butterflies as shown in the picture from A2 sized white paper panel. I used it as a shaker window panel. I adhered the acetate behind the panel using C4U double sided tape, and then added the C4U foam tape to the back of the acetate piece, filled with sequins, closed each shaker window using pink coloured card stocks.
 

After mounting the shaker panel on card base, I added two of Claudie Butterflies and the sentiment banner using C4U foam tape.


Thank you so much for stopping by. Happy crafting!!

Hugs,
Yoonsun


Wednesday, 9 May 2018

Creative Team Butterfly Wishes Slider Card

Creative Team Butterfly Wishes Slider Card

By Creative Team member - Helen Cooke


Supplies:

Paper Roses – Stitched Simple Tags die
Little Birdie Flowers – Pearl FlorettesCoral;  Audria Blush
Cardstock : textured [pink] and white A5 (folded)
Crafts 4 U Glitter Paper A5 - Soft Pink & Plum
ZIG Two Way Glue


Instructions:

As I have these gorgeous flowers, I thought I’d go pretty in pink with this card.
I started by running the pink texture card through my Cuttlebug, then cut a small curve from the Slide Alongs in the top corner.   I cut two butterflies, one solid from the pink card and one delicate from the dark pink glitter card and glued them together at the body. 
Next I punched at least 10 circles from scrap card and 2 from the pink card.  I glued the circles together in two sets, making sure there was a pink circle on the top of both.  One set goes under the curve, the other on top of the curve.  There is a tiny piece of foam tape gluing the two sets together which allows the butterfly to move along the curve freely.
I placed another slightly smaller piece of pink cardstock underneath the first one using foam tape.  The small gap between the two layers allows the butterfly to move freely.
Next I cut a small white tag, stamped the sentiment and adhered it with double sided tape.
A mat was cut from pale pink glitter card and attached to the folded white A5 card.  The front of the card was attached using double sided tape.
Lastly the flowers were arranged on the bottom left side with a couple of smaller ones on the tag.  I used the Tombow Aqua glue to keep them firmly in place.
Thanks for coming and looking at today’s quick tutorial.  See you next time!


Monday, 7 May 2018

Saturday, 5 May 2018

Creative Team - Butterfly Kisses Art Journal Project

Creative Team Butterfly Kisses Art Journal Project

By Creative Team member - Dani Choate


Supplies:


Dina Wakley Scribble Sticks - set 2 (Sedona, Blushing, Fuschia & Marine)
Pink Paislee patterned paper 10 - squares of pattern to cut butterflies out
Pinkfresh Be You 'Sincere' paper - green with dot
Cocoa Vanilla - More Than Words - 'Gossamer' - fussy cut butterflies out
Cocoa Vanilla - More Than Words - 'Collage' - black and white larger butterflies
Helmar 450 glue


Instructions:

Using Dina Wakley Scribble Sticks in Sedona, Blushing & Fuschia scribble and wet blend some colour into the right hand page, top right hand corner.
Using the same colours apply some pigment to a plastic bag or craft mat, mix with water to create a liquid watercolour style paint and then flick some splatters outward across the page originating from the location that you will place your main cluster.
Do the same flicking of colour with Marine out across the page.

 
Cut your Pink Paislee pattern #10 paper into small squares so you have many different paper patterns.
Using your Crafts 4U Medium Butterfly Die, cut a few different patterns of butterflies. Put aside the butterflies. Make sure to save the outer frames.
With the outer frames of the die cut butterflies we will be stencilling.
Using a baby wipe and a butterfly frame, Stencil  away some colour from the red sections on the page.
Also stencil some shadow colour (light red from the baby wipe) onto, some of the white ares on the right hand page)
Stencil some medium and small butterflies in marine using a spomge acros the left hand page. Make sure that the colour is light.
Fussy cut quite a few butterflies from the Cocoa Vanilla 'More than Words' paper. Some in the small coloured variety and 3 in the black & white larger variety.
 
Die cut a large scalloped circle with the Crafts 4U Decorative Round die
Glue a rough piece of loose gauze  onto the right hand page
Attach the Circle Die Cut and pop up with dimensional tape
Cluster the die cut butterflies around the inside edge of the circle...  as if the butterflies are about to fly outward.
 
Inside that cicular cluster, glue 3 Cocoa Vanilla fussy cut small butterflies
At the centre of the circle glue a single blue flower
Randomly place flowers and butterflies around the page as if the butterflies are flying off the page
 
Use puffy Pinkfresh lettering to add a quote or sentiment. I have written 'Butterfly Kisses' and then typed with a typewriter...  '...and ladybug hugs'
 
Some of the pink flowers can be altered with scribble sticks to have them more accurately pick up the mauve tone that the pink lettering has.


(BK-5)
(BK-7)