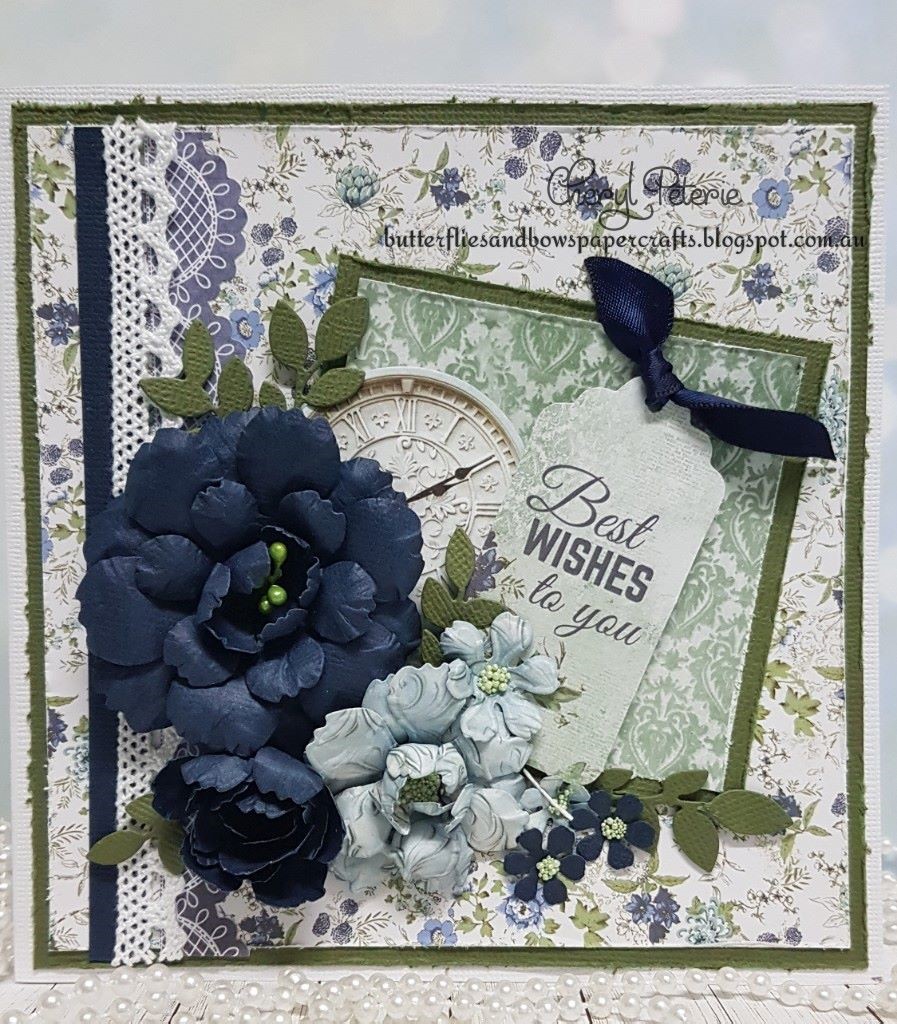
Creative Team Blue Posy Easel Card
by Cheryl Peterie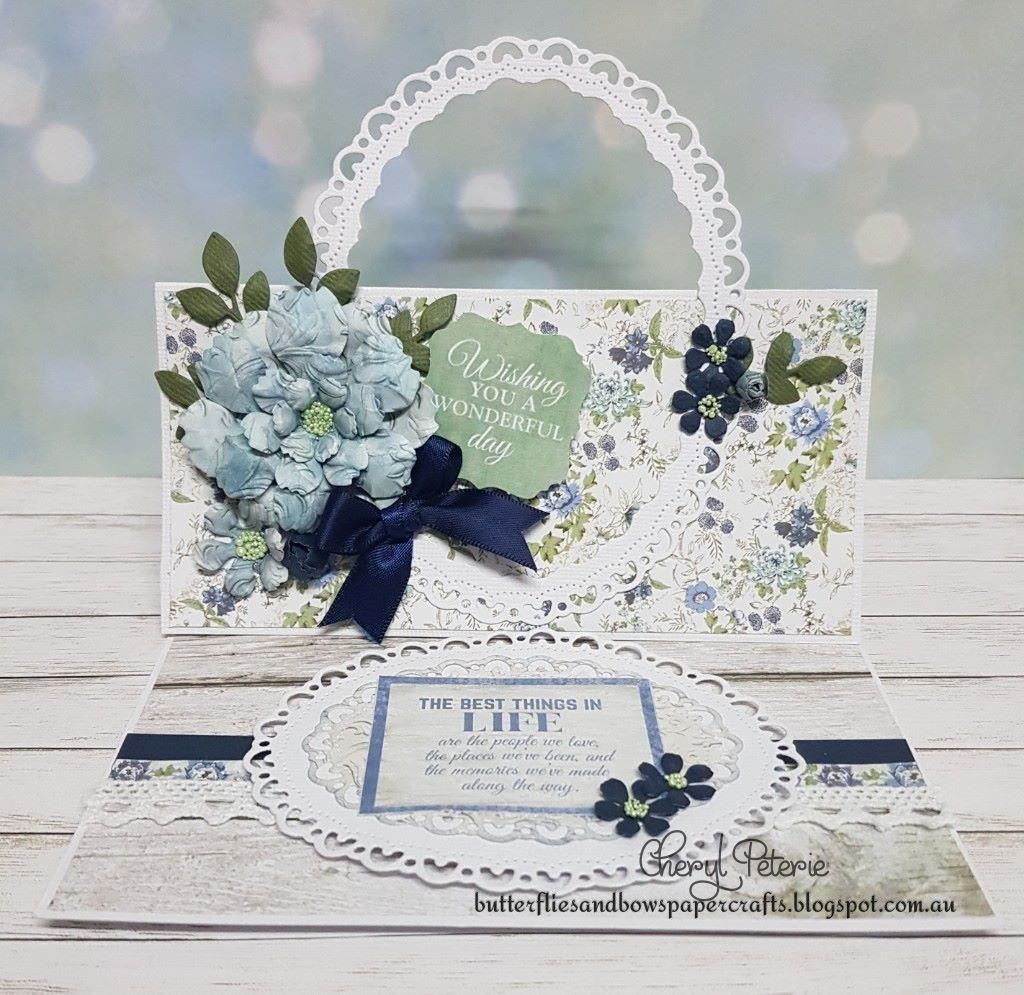
Supplies:
12" x 12"
Smooth White Card stock
Kaisercraft Cardstock - Forest
Kaisercraft Cardstock - Navy
Kaisercraft - Wandering Ivy
12" Paper Pack
Kaisercraft -Wandering Ivy
6½" Paper Pad
Navy Satin Ribbon
White Lace
Flower Shaping Kit
Tools
Basic tool kit (Crafts4U trimmer, scissors, Crafts4U
double sided Tape, Crafts4U Foam Tape, pencil, tweezers etc), Glue, Washi Tape
(for holding dies in place), Die Cutting Machine.
Instructions
(NB; with nesting
dies No.1 being the smallest)
Cut a white card base to 12" x 6" fold in half
to a 6" x 6" square & score, open out flat then fold the left
side to the centre fold line to create the easel fold.


Die cut the following
pieces
·
No.5 & No.4 Decorative Ovals to make a frame
from white cardstock.
·
No.1 Decorative Oval from a piece of pattern
paper blend the edge of this oval with Distress Ink-Stormy Sky.

To make the large flower die
cut the following petals from the same paper as the No.1 oval & blend with
Distress Ink - Stormy Sky, once cut & blended assemble & add prills to
the centre
·
Two - No.5 petals
·
One - No.3 petal
·
One No.2 petal (cut an extra one for the single
flower)
·
Two No.1 petals shape & form into a bud
Navy Cardstock - die cut two
No.2 petals shape & form into a bud, die cut four No.1 petals shape leave
single & add prills to the centres. (Best Wishes sentiment pictured instead
of Wishing You)

Cut the following pieces
1.
Background panel to fit the inside base of the
card leaving an even border.
2.
Cut from the same paper as above a 7.3cm x 15cm
& attach to the top panel of the card front.
3.
Cut from the floral paper 7.3cm x 15cm
& attach to the bottom panel on the card front
4.
Cut a 1cm x 15cm strip of navy cardstock.
5.
Cut a 1cm x 15cm floral strip.
6.
Cut a 15cm piece of lace & attach pieces 4, 5
& 6 to the bottom of the inside base panel.


Attach the bottom half of the
decorative oval frame to the bottom panel of the card front, add the leaves,
flowers, buds, sentiment & to finish tie a bow from the satin ribbon dove
tail the ends & adhere to the bottom of the flowers.